
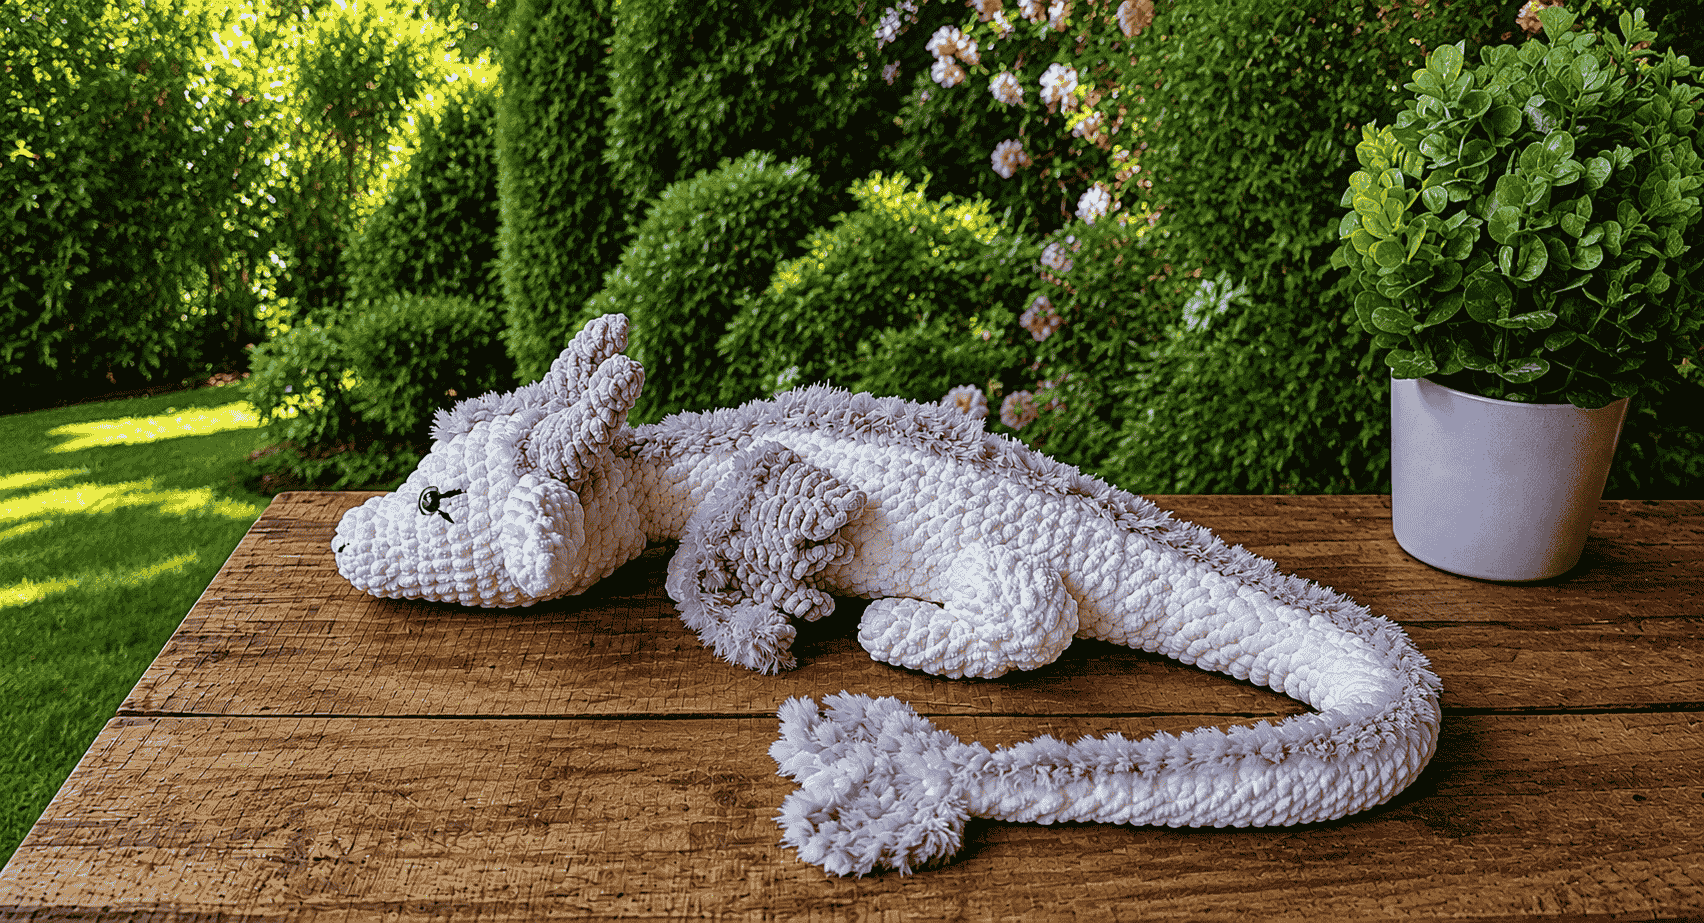
Fee Beginner Crochet Pattern Dragon Snuggler: Make a Cuddly Winnie-Style Dragon
Crochet Pattern Dragon Snuggler: Make a Cuddly Winnie-Style Dragon
There is a special kind of satisfaction in making a dragon from yarn. You begin with a hook, a few soft skeins, and a handful of simple stitches. Gradually, a long tail, gentle face, little feet, and characterful wings emerge. By the end, you have made a companion that feels entirely your own.
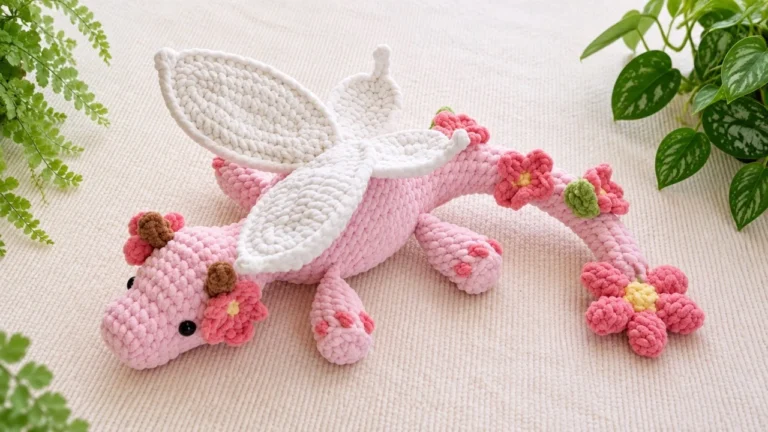
This Crochet pattern dragon snuggler guide is based on the construction of Winnie the Dragon by Cutestylee Crochet. Winnie is not a flat lovey-style snuggler; she is a large, fully stuffed, three-dimensional dragon designed to be cuddled, displayed, and treasured. The numbered instructions below are arranged as a practical article, with original project photographs placed at the stages where they are most helpful.
Contents
What You Will Make
Winnie is a substantial plush dragon with a softly curved body and tail, a shaped oval head, four limbs, ears, horns, wings, and fluffy decorative details. In the original materials, blanket yarn produces a dragon of about three feet. Your finished size will change with your yarn weight, hook size, tension, and stuffing level.
The project is best suited to an ambitious beginner or intermediate crocheter. You should be comfortable working in continuous rounds, counting stitches, increasing, decreasing, and sewing pieces together. The body is the longest part of the project, so treat it like a relaxed marathon rather than a one-evening task. A few short sessions will be kinder to your hands and make shaping more enjoyable.
For another character-focused make, see this crochet bunny in overalls amigurumi pattern. If you enjoy working with plush chenille yarn, you may also like this crochet black cat plushie pattern.
Materials for a Crochet Pattern Dragon Snuggler
Before beginning your Crochet Pattern Dragon Snuggler, make a small swatch so you can choose the hook that gives you a close, even fabric.
The original design works well in chenille or blanket yarn. These yarns create the round, cushiony texture that makes a large dragon feel especially cuddly.
| Material | How you will use it |
|---|---|
| 5 mm, 5.5 mm, or 6 mm crochet hook | Choose the hook that gives you close, even stitches. |
| Main-color chenille or blanket yarn | Body, head, limbs, and ears. |
| Contrast yarn | Horns and wings. |
| Optional fur yarn | Back ridge, tail details, and horn accents. |
| Polyester fiberfill | Firm body and head stuffing; light limb stuffing. |
| Black yarn or embroidery floss | Embroidered eyes, eyelashes, and nostrils. |
| Optional safety eyes | Use only when appropriate for the recipient’s age. |
| Yarn needle, scissors, and stitch marker | Assembly, finishing, and round tracking. |
The original sample uses about 240 g of main-color Bernat Blanket yarn, with smaller amounts of contrast and fur yarn. Buy extra main yarn if you are matching a particular dye lot. The body uses the most yarn, and a second skein is much less frustrating than trying to match a discontinued color later.
Abbreviations and Helpful Tips
| Abbreviation | Meaning |
|---|---|
| ch | Chain |
| sc | Single crochet |
| hdc | Half double crochet |
| inc | Increase |
| dec | Decrease |
| sl st | Slip stitch |
| TW | Turn work |
Work the round pieces continuously unless you prefer to join rounds with a slip stitch. Place a stitch marker in the first stitch of each round if you tend to lose your place. Add stuffing as you work rather than trying to force it through a narrow opening at the end. When fastening off, leave a long yarn tail for sewing.
Body and Tail Instructions
Your Crochet Pattern Dragon Snuggler body should feel smooth and flexible rather than tightly packed; check the shaping as you move through the rounds.
Use the main color. Stuff firmly and shape the body as you go.
- R1: Ch 2, 4 sc in the first chain. [4]
- R2-R6: 4 sc around. [4]
- R7: Inc, 3 sc. [5]
- R8-R12: 5 sc around. [5]
- R13: Inc, 4 sc. [6]
- R14-R18: 6 sc around. [6]
- R19: Inc, 5 sc. [7]
- R20-R24: 7 sc around. [7]
- R25: Inc, 6 sc. [8]
- R26-R30: 8 sc around. [8]
- R31: Inc, 7 sc. [9]
- R32-R36: 9 sc around. [9]
- R37: Inc, 8 sc. [10]
- R38-R42: 10 sc around. [10]
- R43: Inc, 9 sc. [11]
- R44-R48: 11 sc around. [11]
- R49: Inc, 10 sc. [12]
- R50-R54: 12 sc around. [12]
- R55: Inc, 11 sc. [13]
- R56-R60: 13 sc around. [13]
- R61: Inc, 12 sc. [14]
- R62-R66: 14 sc around. [14]
- R67: Inc, 13 sc. [15]
- R68-R70: 15 sc around. [15]
- R71: 3 inc, 12 sc. [18]
- R72-R73: 18 sc around. [18]
- R74: (1 sc, inc) x3, 12 sc. [21]
- R75: (2 sc, inc) x3, 12 sc. [24]
- R76-R77: 24 sc around. [24]
- R78: (inc, sc) x3, 3 sc, (sc, inc) x3, 9 sc. [30]
- R79-R83: 30 sc around. [30]
- R84: (inc, 2 sc) x3, (2 sc, inc) x3, 12 sc. [36]
- R85: 36 sc around. [36]
- R86: (dec, 2 sc) x3, (2 sc, dec) x3, 12 sc. [30]
- R87-R91: 30 sc around. [30]
- R92: (dec, sc) x3, (sc, dec) x3, 12 sc. [24]
- R93-R94: 24 sc around. [24]
- R95: (2 sc, dec) x6. [18]
- R96-R101: 18 sc around. [18]
Fasten off with a slip stitch and leave a long yarn tail for attaching the head.
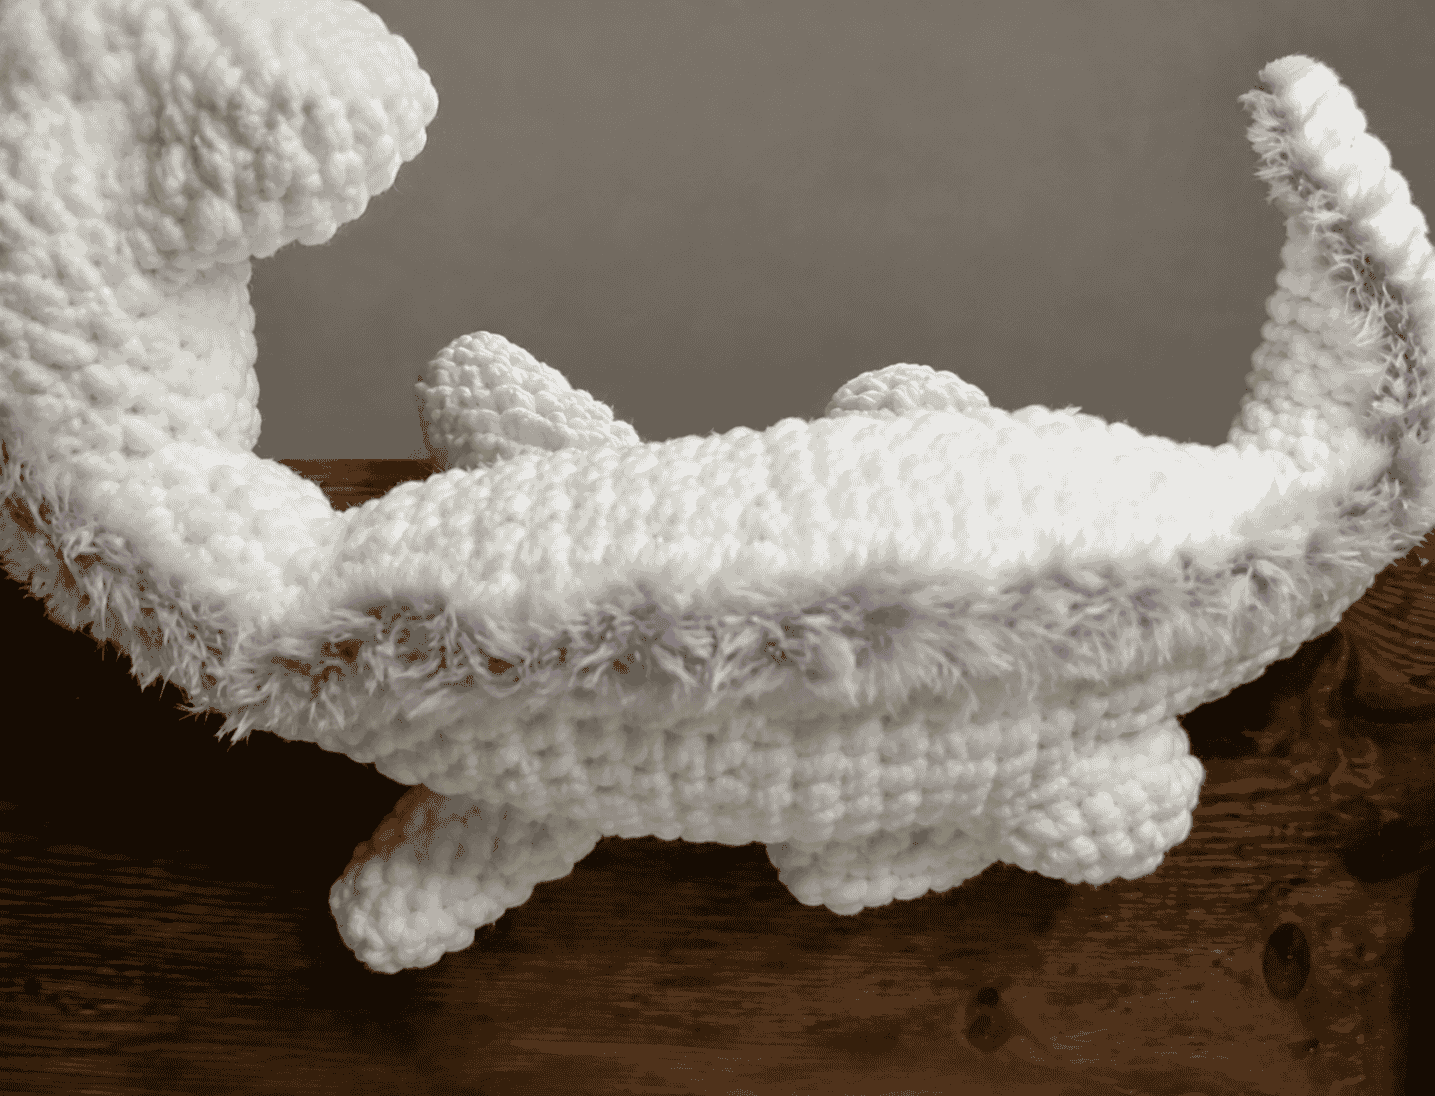
The body begins as a narrow tail and expands into the central torso. Keep the flat belly facing down while shaping it. If the form looks uneven, gently redistribute the stuffing and massage the fabric into a smooth curve before continuing.
Head and Face Instructions
Use the following numbered rounds to give your Crochet Pattern Dragon Snuggler a gentle, cuddly expression.
Use the main color. Stuff firmly before closing.
For a visual eye-detail reference, watch this eye-embroidery tutorial before stitching the face.
- R1: Ch 5. Start in the second chain from hook: 3 sc, 3 sc in the last chain; turn and work the unused side: 3 sc, 3 sc in the last chain. [12]
- R2: 3 sc, inc, sc, inc, 3 sc, inc, sc, inc. [16]
- R3-R4: 16 sc around. [16]
- R5: 6 inc, 10 sc. [22]
- R6: Inc, 8 sc, inc, 12 sc. [24]
- R7: (sc, inc) x6, 12 sc. [30]
- R8: (inc, 2 sc) x3, (2 sc, inc) x3, 12 sc. [36]
- R9-R14: 36 sc around. [36]
- R15: (dec, 2 sc) x3, (2 sc, dec) x3, 12 sc. [30]
- R16: (3 sc, dec) x6. [24]
- R17: 3 dec, 4 sc, 3 dec, 8 sc. [18]
- R18-R19: 18 sc around. [18]
Place safety eyes around rounds 7-8, approximately eight stitches apart, if you are using them. For an infant or toddler gift, embroider the eyes instead. Fasten off and join the head to the body using the long body tail.
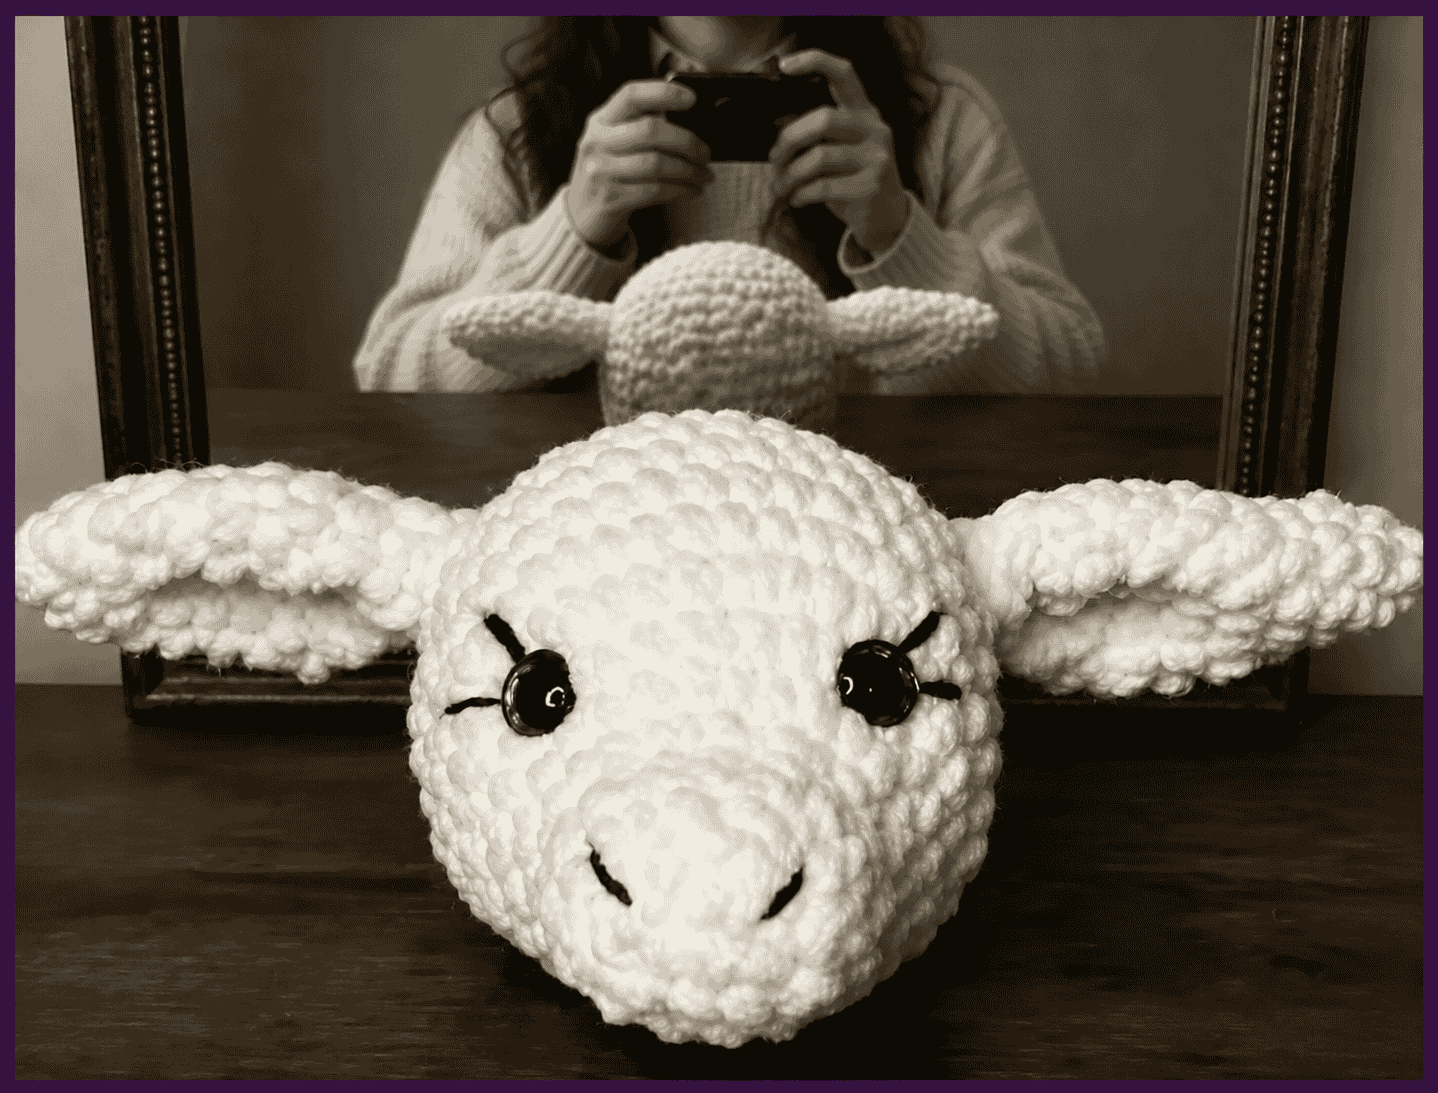
The oval head is one of this dragon’s most distinctive features. Before securing the eyes, test their placement from a distance. Eyes placed farther apart create a softer, sleepier expression; closer placement makes the dragon look more alert. Add small embroidered nostrils at the end, after the head is fully attached.
Limbs, Ears, and Horns
Thighs – Make 2
- R1: Ch 2, 6 sc in the second chain from hook. [6]
- R2: Inc in every stitch. [12]
- R3: (1 sc, inc) x6. [18]
- R4: (2 sc, inc) x6. [24]
- R5: 6 dec, 12 sc. [18]
Stuff lightly, fasten off, and leave a sewing tail.
Feet – Make 2
- R1: Ch 2, 6 sc in the second chain from hook. [6]
- R2: (inc, 1 sc) x3. [9]
- R3-R8: 9 sc around. [9]
Stuff lightly, close with a round of slip stitches, and leave a sewing tail.
Front Arms – Make 2
- R1: Ch 2, 6 sc in the first chain. [6]
- R2: (inc, 1 sc) x3. [9]
- R3-R10: 9 sc around. [9]
You may leave the arms unstuffed for a softer drape. Close with slip stitches and leave a sewing tail.
Ears – Make 2
- R1: Ch 2, 3 sc in the second chain from hook. [3]
- R2: 2 sc, inc. [4]
- R3: 3 sc, inc. [5]
- R4: 4 sc, inc. [6]
- R5: Dec, 1 sc, inc, 2 sc. [6]
- R6: Dec, 1 sc, inc, inc, 1 sc. [7]
- R7: 1 sc, inc, inc, inc, 1 sc, dec. [9]
- R8: 9 sc around. [9]
- R9: Dec, 2 sc, inc, 4 sc. [9]
- R10: 3 sc, inc, inc, 4 sc. [11]
- R11: 11 sc around. [11]
Fasten off and leave a long tail. Fold each ear slightly before sewing to create a central indentation.
Horns – Make 2
Use the contrast color. Do not stuff, or stuff only very lightly.
- R1: Ch 2, 3 sc in the second chain from hook. [3]
- R2: Inc in every stitch. [6]
- R3: (1 sc, inc) x3. [9]
- R4: 9 sc around. [9]
- R5: (2 sc, inc) x3. [12]
- R6-R7: 12 sc around. [12]
- R8: (3 sc, inc) x3. [15]
- R9: (3 sc, dec) x3. [12]
- R10: (2 sc, dec) x3. [9]
- R11: (1 sc, dec) x3. [6]
- R12: 6 sc around. [6]
Wings and Tail Details
These finishing pieces give the Crochet Pattern Dragon Snuggler its familiar soft-dragon silhouette.
Wings – Make 2
Use the contrast color and work in rows.
- Row 1: Ch 8. Start in the second chain from hook: 1 sc, 6 hdc, ch 1, turn.
- Row 2: 4 sc, ch 3, turn.
- Row 3: Sc, 4 hdc, hdc inc, ch 1, turn.
- Row 4: 4 sc, ch 3, turn.
- Row 5: Sc, 4 hdc, hdc inc, ch 1, turn.
- Row 6: 4 sc, ch 3, turn.
- Row 7: Sc, 4 hdc, hdc inc, ch 1, turn.
- Row 8: 4 sc, ch 5, turn.
- Row 9: Sc, 7 hdc, ch 1; then work sc along the top edge to smooth it.
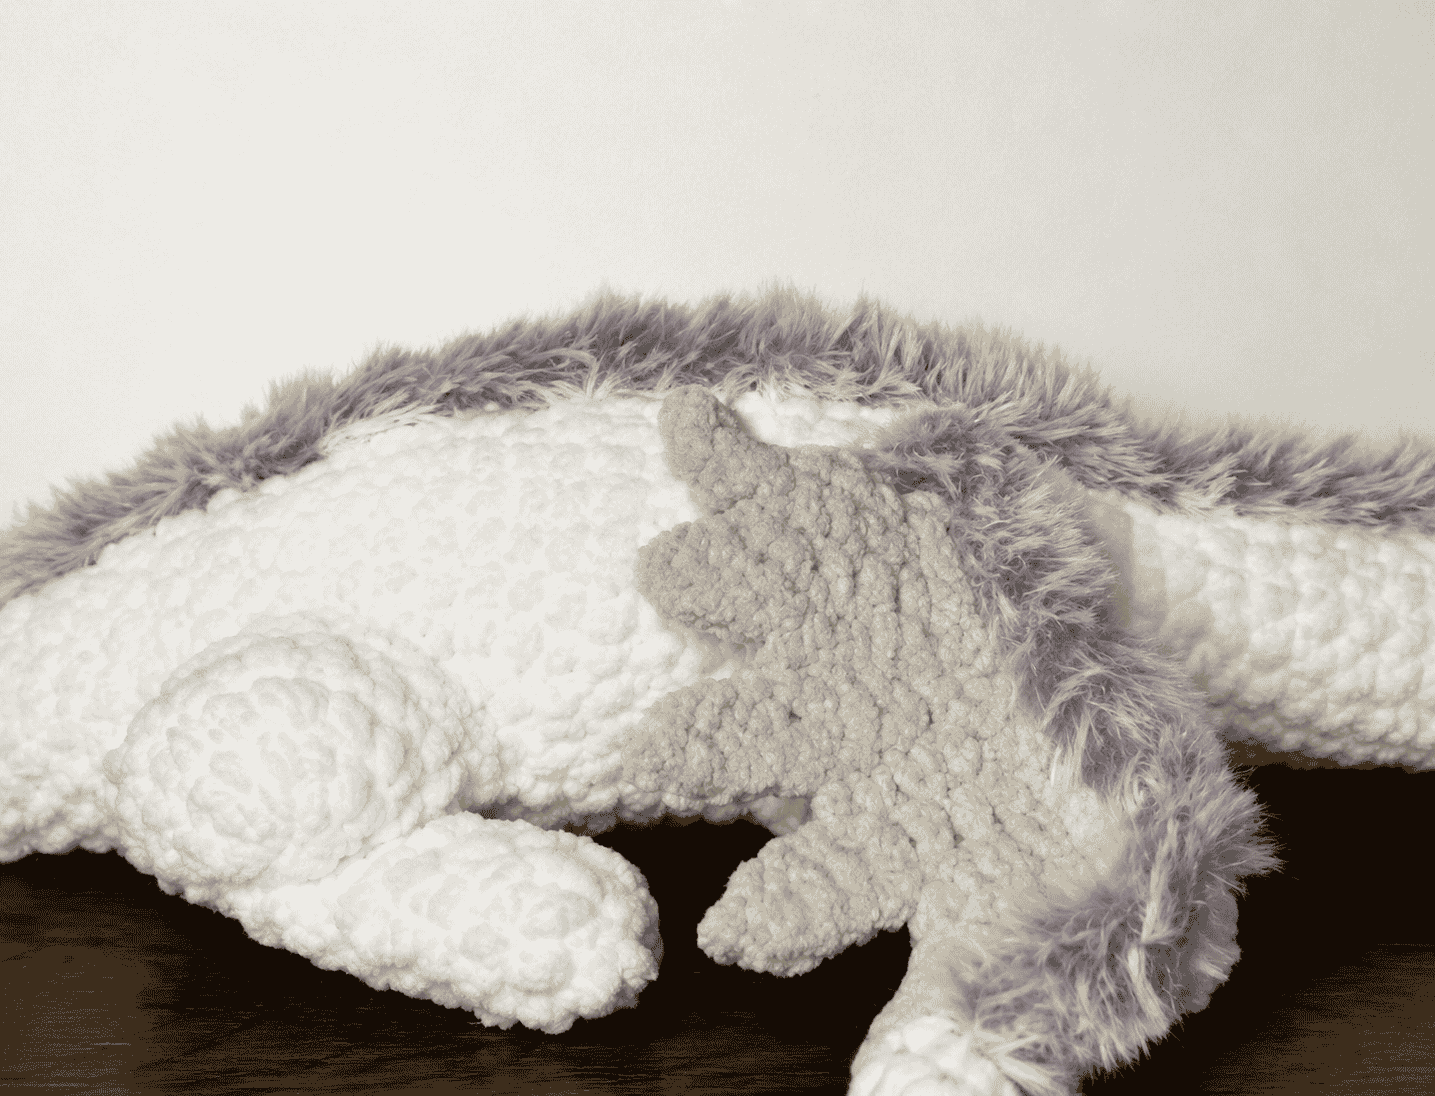
Fasten off and leave a sewing tail. An optional fur-yarn edging creates a feathery finish.
Tail Details
Tail Piece 1 – Make 1: Ch 13 in contrast yarn. Change to fur yarn and, from the second loop from hook, work 2 sc and 10 hdc. Turn to the unused side and work 10 hdc, 1 sc, and 1 sl st. Fasten off with a sewing tail.
Tail Pieces 2 and 3 – Make 2: Ch 9 in contrast yarn. Change to fur yarn and, from the second loop from hook, work 2 sc and 6 hdc. Turn to the unused side and work 6 hdc, 1 sc, and 1 sl st. Fasten off with a sewing tail.
Assembly Order
Lay out every piece before sewing so your Crochet Pattern Dragon Snuggler stays balanced from nose to tail.
- Sew the ears to the head.
- Attach the horns just behind and above the ears.
- Sew the head securely to the body.
- Add an optional fur stripe from tail toward the head.
- Attach the thighs to both sides of the body.
- Position the feet so the dragon lies evenly.
- Sew the front arms below the neck.
- Attach the wings along the upper back.
- Sew the large tail piece onto the tail tip, then place the two smaller pieces on either side.
- Finish the face with eyes, eyelashes, nostrils, blush, and optional fur around the horn bases.
Pin all pieces before sewing. This lets you check that the wings and legs match from both sides. Secure the feet to the thighs as well as the body so they do not flop when the dragon is picked up.
Customizing Your Dragon
Once the structure is complete, your Crochet Pattern Dragon Snuggler is ready for personal color and detail choices.
The white-and-tan version is graceful, but this Crochet pattern dragon snuggler adapts beautifully to other palettes. Try sage green with cream wings for a woodland dragon, lilac with white horns for a nursery gift, or charcoal with silver accents for a night-dragon look. You can also replace the fur yarn with a smooth contrast color for a cleaner, scaled appearance.
For young children, embroider the eyes and avoid buttons, beads, or loose decorative parts. If your dragon is for display or an older child, safety eyes and a little blush can make the face especially expressive. Take a final photograph in natural light, showing the full body, wings, and tail: it is the best way to show off the scale of your finished work.
Care for Your Finished Dragon
Check the yarn label before washing. If machine washing is allowed, place the dragon in a mesh laundry bag, choose a gentle cool cycle, and reshape it before air-drying flat. Avoid high heat because it can change the feel of plush synthetic yarn. Inspect the seam at the neck, the wings, horns, and limbs after washing or heavy play; reinforce any loose stitches promptly.
FAQ: Crochet Pattern Dragon Snuggler
Conclusion
Your Crochet Pattern Dragon Snuggler is now ready for cuddles, display, or a thoughtful handmade gift.
This dragon is a joyful project because every finished piece changes the character in your hands. Take your time with the long body, place each feature carefully, and use your photographs to show readers exactly how the project develops. Once the horns, wings, face, and tail are in place, you will have a magical handmade dragon ready for cuddles, display, or gifting.
For your next project, explore these hooded mini plushie animal patterns or make a quick decorative crochet bow for your finished gift.
Ready for your next soft make?
Save this dragon pattern, share your finished version, and explore the related amigurumi projects above.
3 Comments